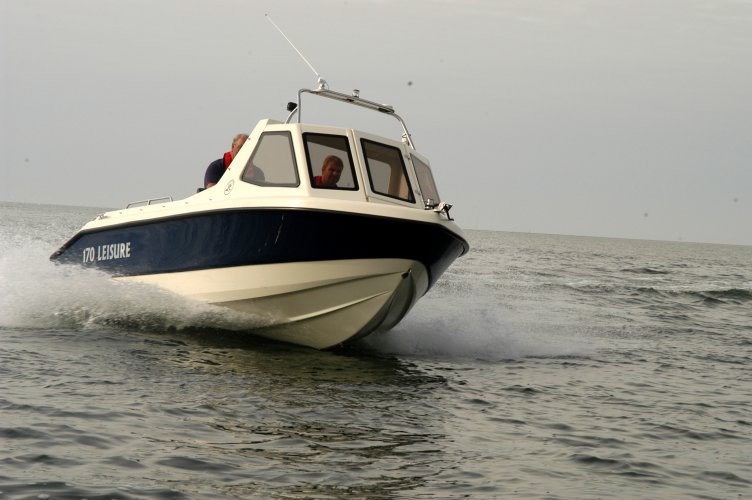
Following the Warrior 170
From Conception to Birth

This story starts in August of 2007. I was sat in the office at Warrior Boats chatting with Phil Byrom and Paul Haynes, when out of the blue, Phil brought a line drawing of a hull up on to his computer screen. "What do you think of this then. It's the new hull for the Warrior range, and it's going to be our next model the 170 which features all the best bits of the 175 and the ProAngler aimed jointly at the angling and leisure market". Some years earlier I had been in a similar situation when they had decided to produce the ProAngler, and I blew the chance to follow that one through with the cameras from conception to birth. Not wanting to repeat that mistake, I asked if I could see this one through from the computer screen to the water, and they agreed. A fascinating journey to take. Never again will I be able to look at scrubbed up sales teams stood in front of highly polished boats at shows like London and Southampton in the same light. What I was about to witness was a full year of dirty, messy, and at times frustrating hard graft combining actual bits cut from existing mouldings with MDF and body filler to generate the shapes required from which to get a set of three new working moulds.
The new hull had been specifically designed for Warrior by John Moxham who was also responible for their other models. The balance and aesthetics of the actual dimensions had of course been computer generated. The plug was then cut using laser guided machinery to a tolerance of plus or minus one millimetre, which on a lump that size is bloody accurate. During the first week in November this arrived at the factory, its black outline reminiscent of Darth Vaders helmet perched upside down fixed to a rigid transforation platform. We spent the remainder of that afternoon examining it and discussing the finer points of its design and their implications on the water which would be the best part of a year away. To me it looked pefect in terms of finish. But not apparently good enough for a top quality mould to be taken from it. And the following morning it was unrecognisable having lost all its shine to a light wet and dry rubbing down paper followed by some very intense machine polishing to improve the finish both from a visual as well as a working perspective. This was essential to make it easier to separate from the mould when that was glassed onto it. Hour upon hour of laborious elbow grease went into preparing that plug. Something that was to become a familiar theme throughout this whole modelling and construction process.

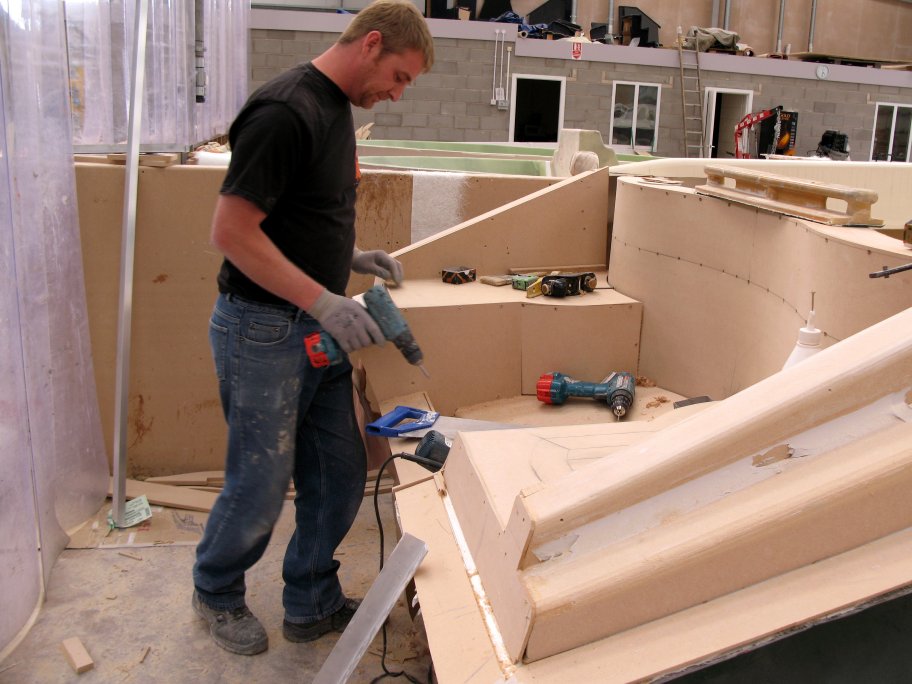
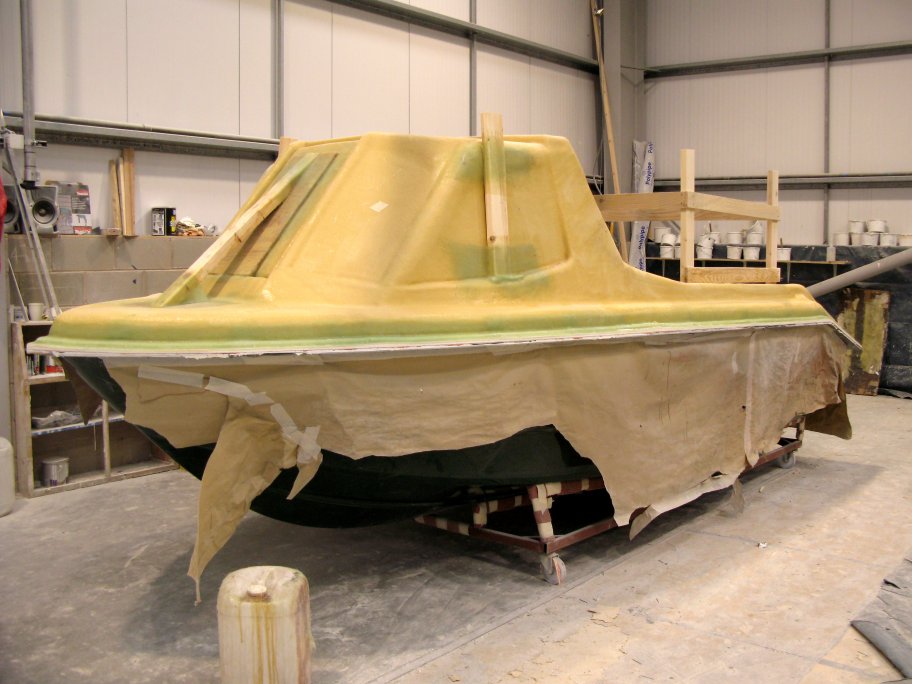
Within days the mould had been laid up and separated off. This then had a metal frame glassed to it to keep it from twisting and to allow it to be be mounted on a rotating spit for laying up the hulls it would later produce. But first, as if you hadn't already guessed it, lay many hours of polishing the mould to perfection. While this was going on, a second mould reaching to just beyond the water line was also being taken from the plug. After being reinforced, this would be used to seat the first moulded hull in on the stand while work on constructing the undefloor support and locker system was underway actually inside the hull. This was my introduction to the world of sculping with filler and MDF, an art form I was to become extremely familiar with over the coming months. Afterall, at this stage, the object of the exercise is not to construct an actual boat, but to make a shape from which the mould that will later be used to construct the boat is taken. And it really doesn't matter how that shape is formed. This said, it is still done with a level of care, accuracy, and as ever, attention to finish and fine detail befiting what will ultimately become a very high class piece of kit.
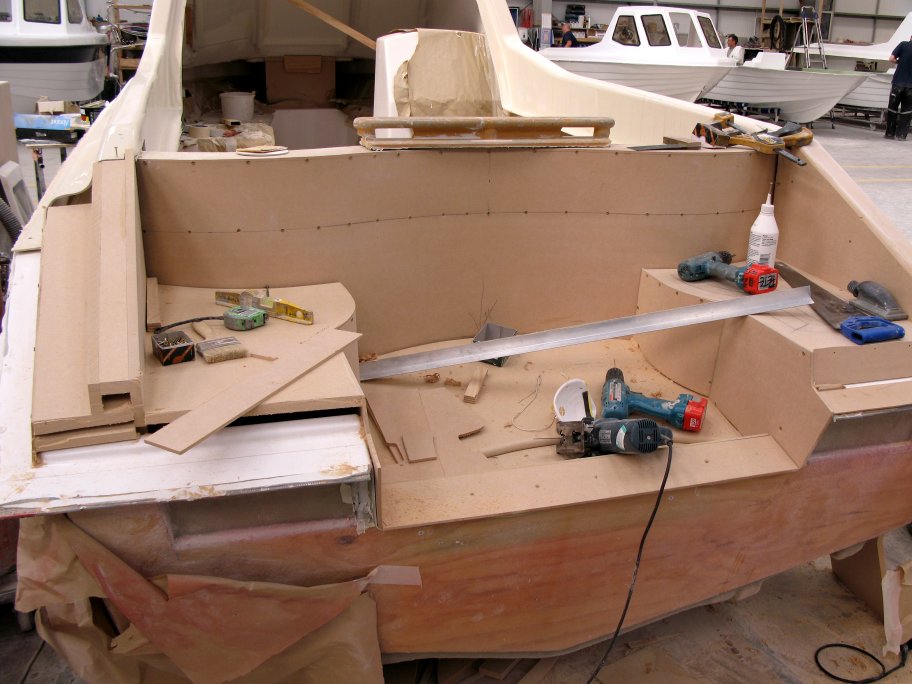
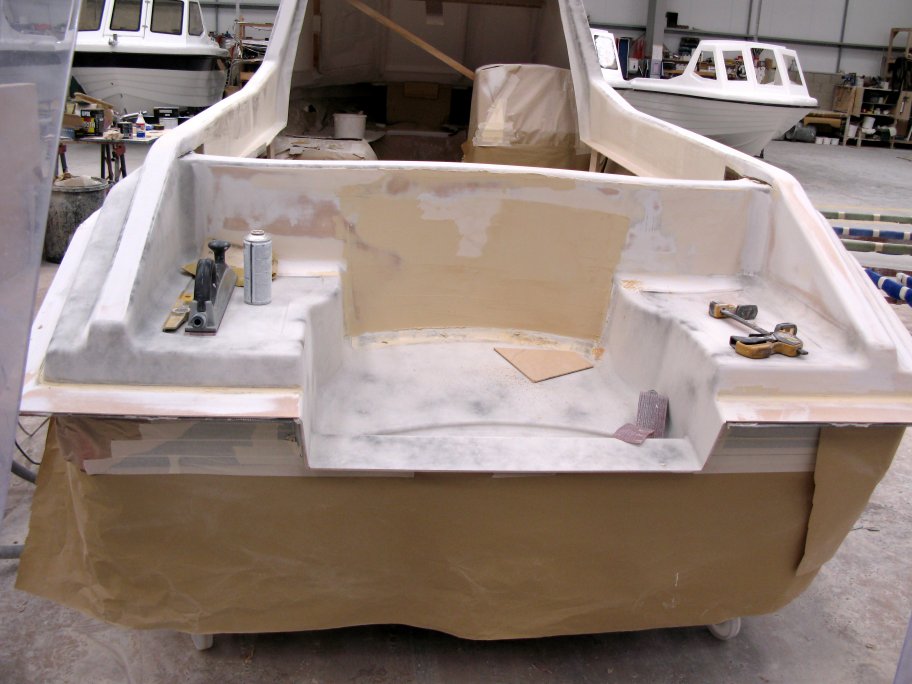
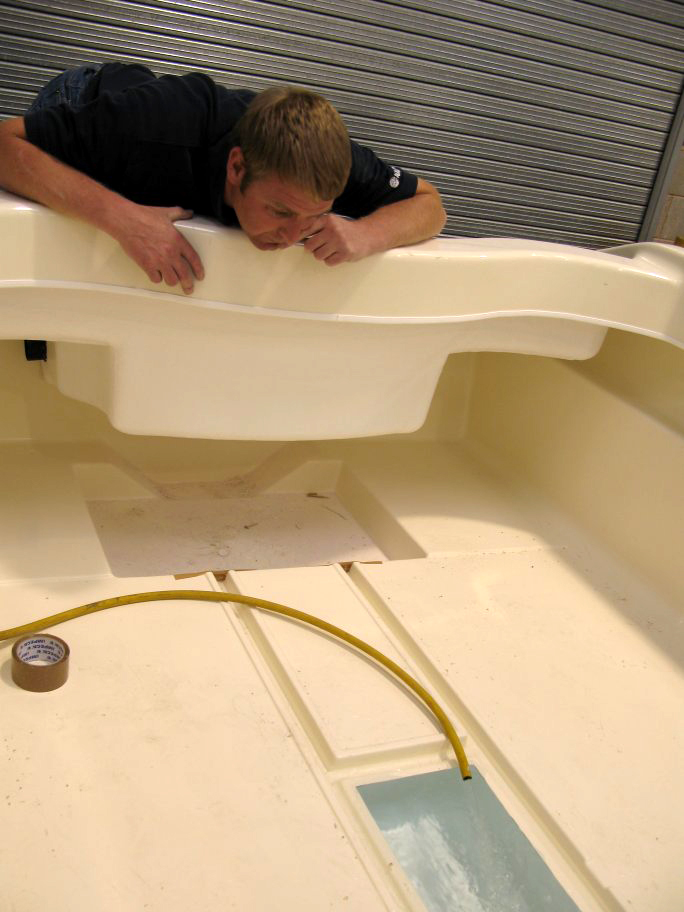
After completing the floor locker template, a mould was taken, and it was subsequently removed in its MDF and filler paste form from the hull to be sustituted by the real thing. This then allowed work on making the interior floor, sides, lockers and console moulding to begin, to give the boat its one piece gel coat finished inner double skin. Fortunately, some of this work had already been done in the form of the ProAngler inner skin moulding. Obviously, having different beam and OAL dimensions, this was never going to exactly fit the new 170. But when the ProAngler version was cut up into sections, these would provide the basis at least for the construction and design. Some additional tweaks and adaptations were also added, including a completely redesigned steering console to take as standard a full set of flush fit Lowrance electronics. All the gaps and spaces which the cutting and stretching had created were then treated to the usual filler and MDF sculping, plus a lot of very carefully balanced and time intensive aesthetic shaping. And let's not forget the countless hours of rubbing down and polishing to absolute perfection of the completed template for the mould to be taken off, after which, as before, the whole lovingly crafted affair was emotionlessly demolished using an angle grinder and hammer.
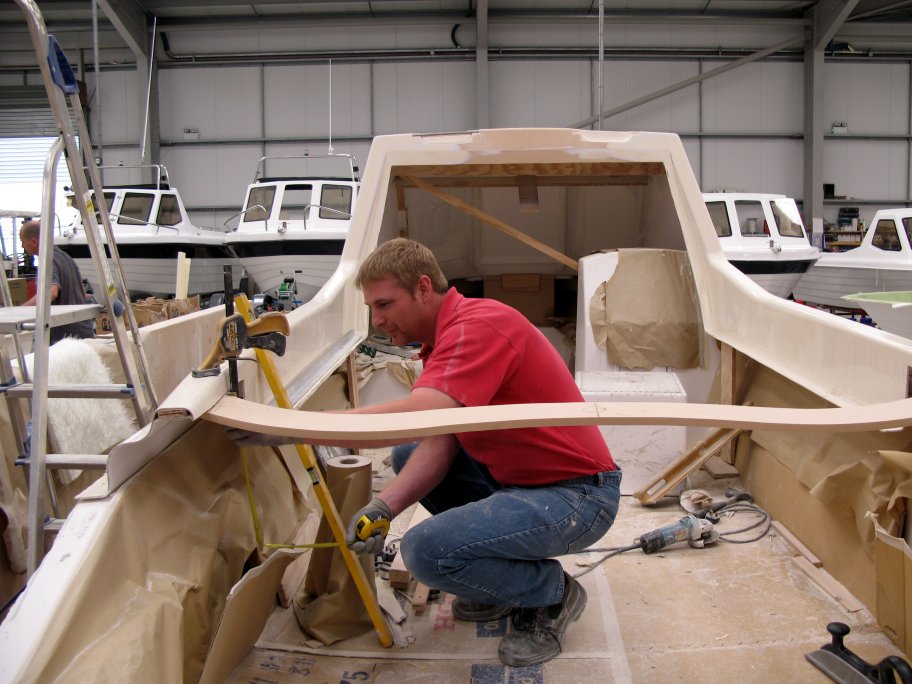
With the inner skin and below deck locker mouldings in place, work was then able to begin on constructing the new top. Again, the ProAngler model provided the basis for the template, and as previously, it took a lot of carefully thought through cutting and crafting to get even the crudest of fits. Some years earlier, the ProAngler top had been made in exactly the same way from a pre-existing Warrior 165 top, which right at the birth of Warrior Boats as a company, had actually been made from scratch. Had that option not been available here, then a very lengthy and arduous new build process would again have had to have been gone through. Fortunately this time around most of the work was already done. Unfortunately, after cutting the ProAngler top into two halves lengthways along its centre line to have it fit on top of the gunnels, there was quite a sizable gap in the middle of the cuddy section, because the 170 has a beamier hull. There was also a bit missing at the back. Actually, there was a lot missing, as the whole backend had been comletely removed, in part due to the resizing, but as importantly because like the 175, the new 170 was to have a sloped back either side of the rear bulkhead well which the ProAngler top being butchered here did not have.

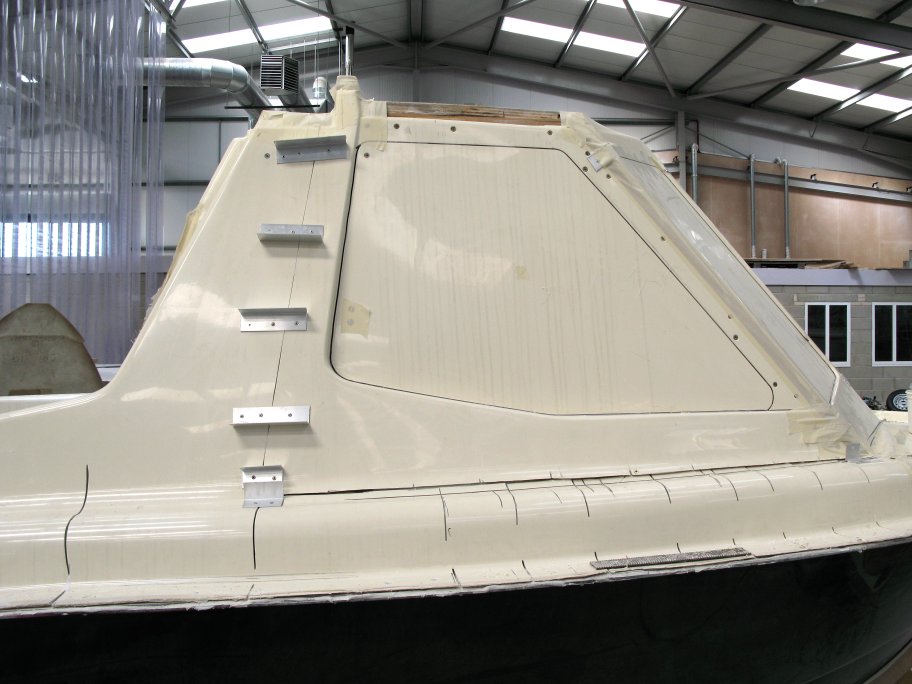
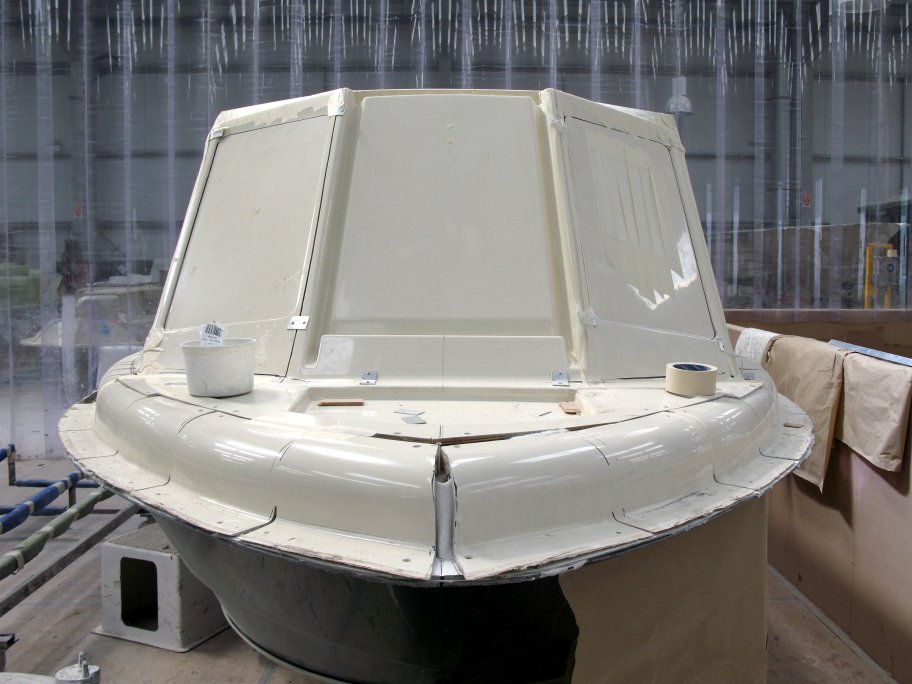
This time around, the MDF played a far greater role than in the earlier stages, providing great tracts of the top profile, as did the filler paste. This was probably the trickiest and most demanding part of the whole build process due to the many intricate and often subtle changes in shape and profile. But not everything here was subtle. The entire shape of the cuddy had to be completely re-crafted, on the one hand because it didn't exactly fit in the first place, and on the other to accommodate planned changes to the window angles, the grab rails, and to reshape the many angle grinder cuts put into the donor ProAngler top which had to be bulked up using the filler paste. In addition to this, the back end was a complete rebuild with a curved transom bulkhead to allow greater access at the corners and to incorporate a different stepping arrangement for climbing in from deep water during launching. A lot of thought also went into the aesthetics of this part of the boat, and while there were ways in which it theoretically could perhaps have looked even better, the shaping of a template has to be compatible with getting the mould off it afterwards. You would not believe how even the tiniest little imperfection can make it almost impossible to separate a mould from its plug, hence all the elbow grease and attention to detail during the final preparation stage.
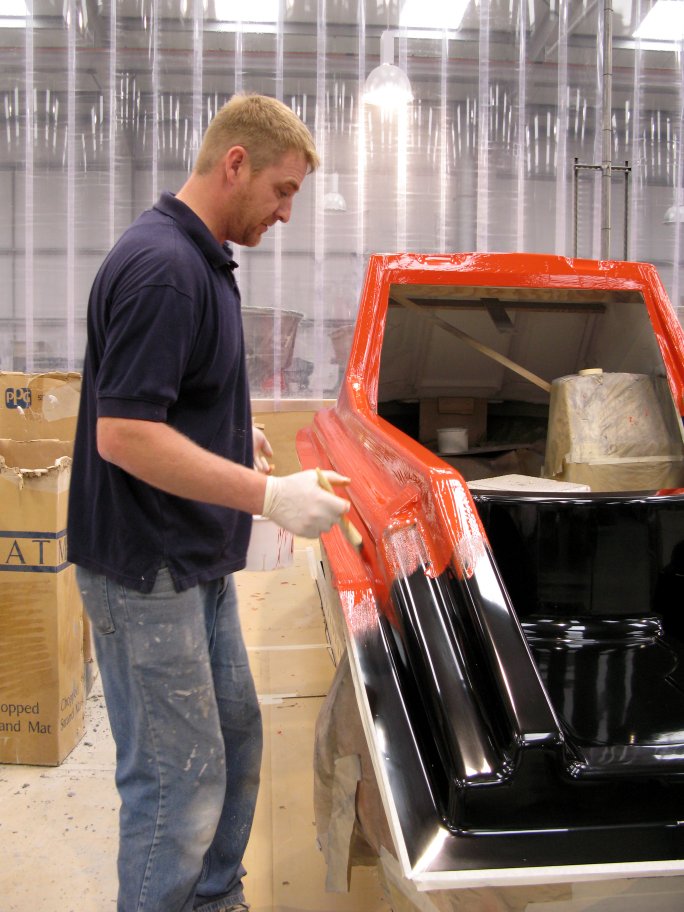
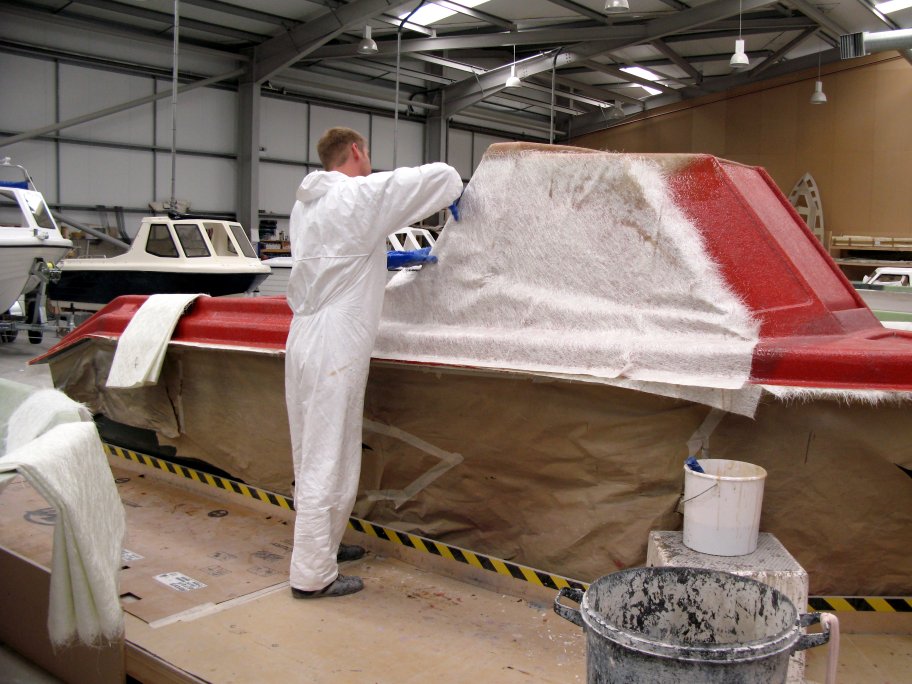
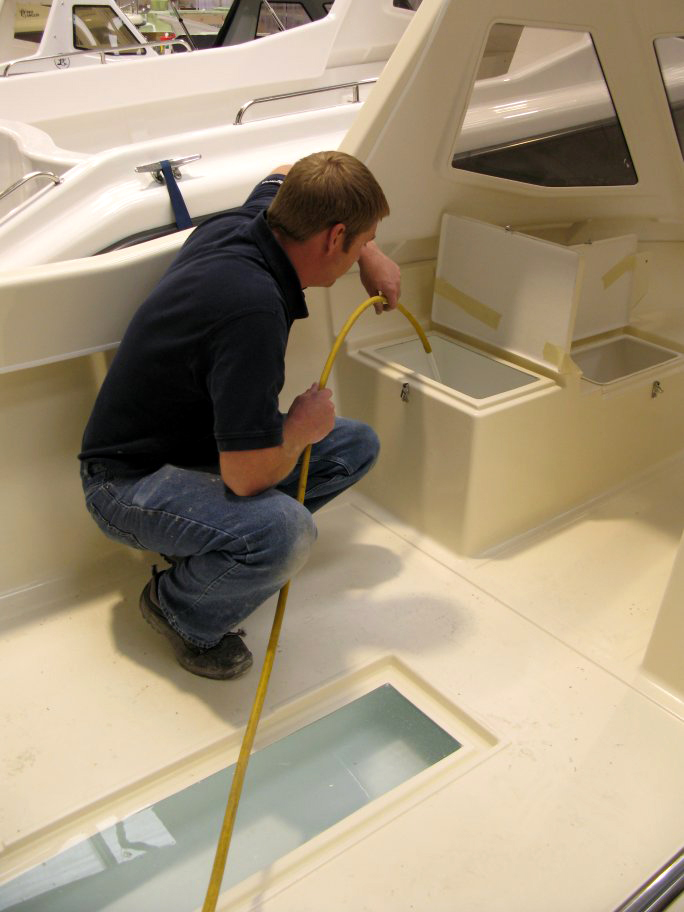
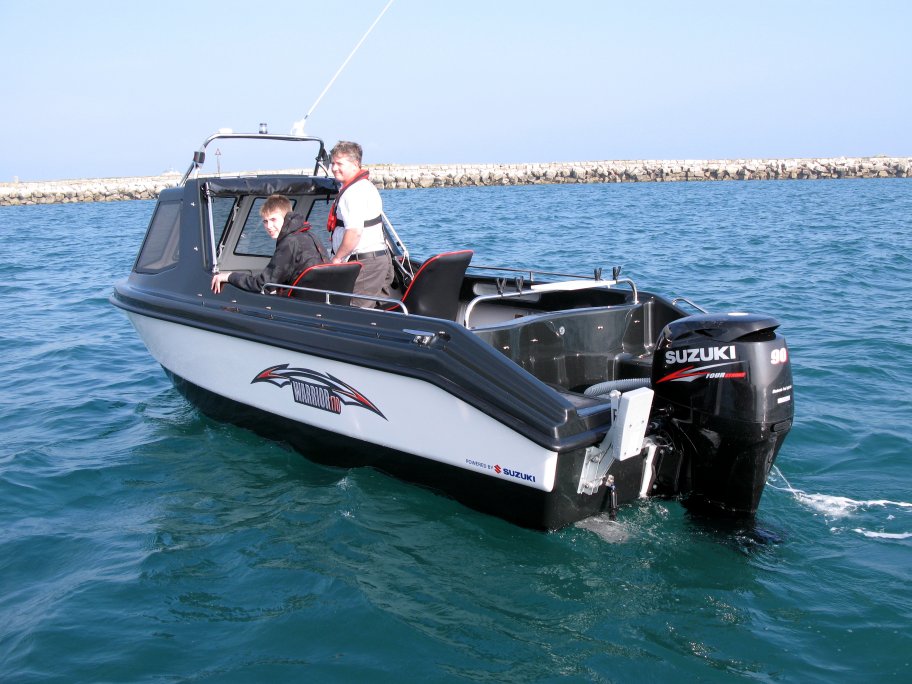
Aided by the careful use of variously sized separation wedges and compressed air pumped in between the interface line, the reinforced mould was soon off the template and ready to produce its first top. While the shop floor team were busy taking care of that, it was back to the cutting room with the angle grinder and hammer, once again to butcher all that loving sculpting work into oblivion. This made way for the first real top to be fitted, and for the finishing team to get to work on making the three completed mouldings, together finally for the very first time, look someting like the long anticipated real thing. The next big question was then how would it perform on the water. But before that, it needed a CE certification from the RYA. This involved amongst other things launching the boat and filling it with water to ensure it would still float, then undertaking various weight distributions trials to simulate having an engine fitted, and people on board when the 'swamping' took place. Only then, with the necessary paperwork in their pocket, would Warrior even consider entering the production phase. But first a demonstrator would be put together for its debut outing on the water to assess its balance and handling characteristics, and generally check out the whole package in a real life context to see what, if any tweaking, or even more radical alterations, might be required to get it up to finished article spec.
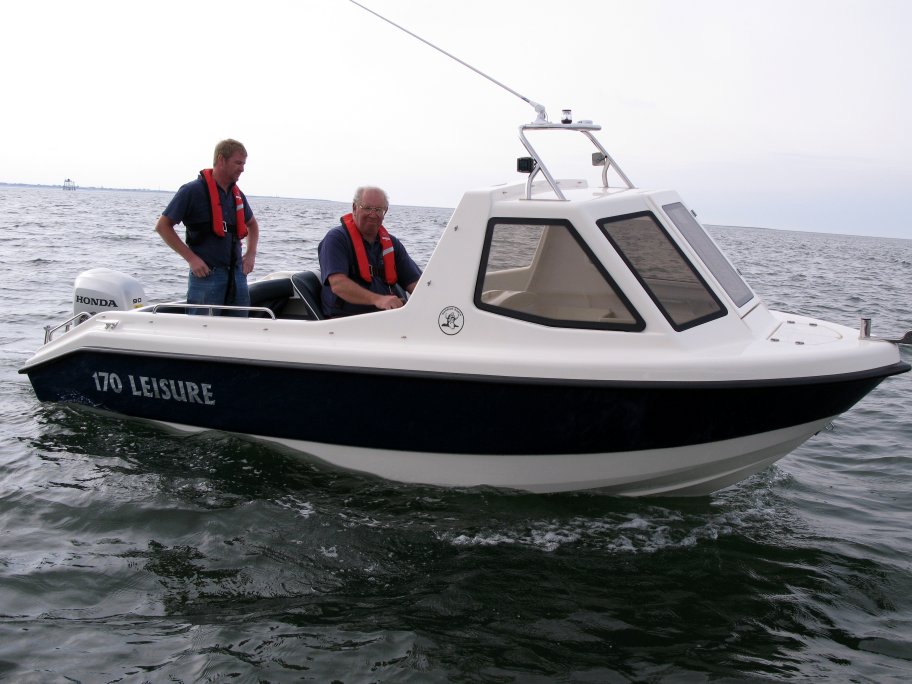
So next time you visit a boat show, amidst all the glitz and glamour, remember how what you see in front of you came to be there. And remember also that the company director all scrubbed up to the nines, in Warriors case at least, was the man in the overalls and face mask covered in fibre glass resin, dust and other assorted categories of crap working literally seven days a week, often till late into the evening to make the deadline of that show. I felt as though I was practically living there myself being on site for all the crucial moments in the development of this boat. So I can only imagine how Warrior co-director Phil Byron felt. Yet still, when the show model was ready to roll out of the factory doors, he felt it was worth it. As a 170 user now myself, I feel like its all been worth it too. Lets hope the rest of the buying public agree.


SEE THE VIDEO VAULT – Birth of a Boat